Desarrollo y Mantenimiento de Sistemas Informáticos
4º. 1er cuatrimestre. Itinerario de Sistemas de la Información. Grado en Ingeniería Informática. ULL
GH Org - GH Template Org - GitHub Classroom - Discussions - Teams - Campus ULL - Students Activity - Chat - Google Meet
Deploying a Next.js app to Netlify
Deploy at Netlify with the UI
Netlify’s Next.js Runtime configures your site on Netlify to enable key Next.js functionality.
It automatically generates serverless functions that handle
- server-side rendered (SSR) pages,
- incremental static regeneration (ISR),
- image optimization, and
- other Next.js features.
See section Next.js on Netlify for more details.
Make public your repo
Regarding prices and restrictions on deployment you can check the FAQ Organization-owned private repository FAQ
Deploy with the Netlify UI
In the Netlify UI, choose new deploy and import your GitHub repo to Netlify
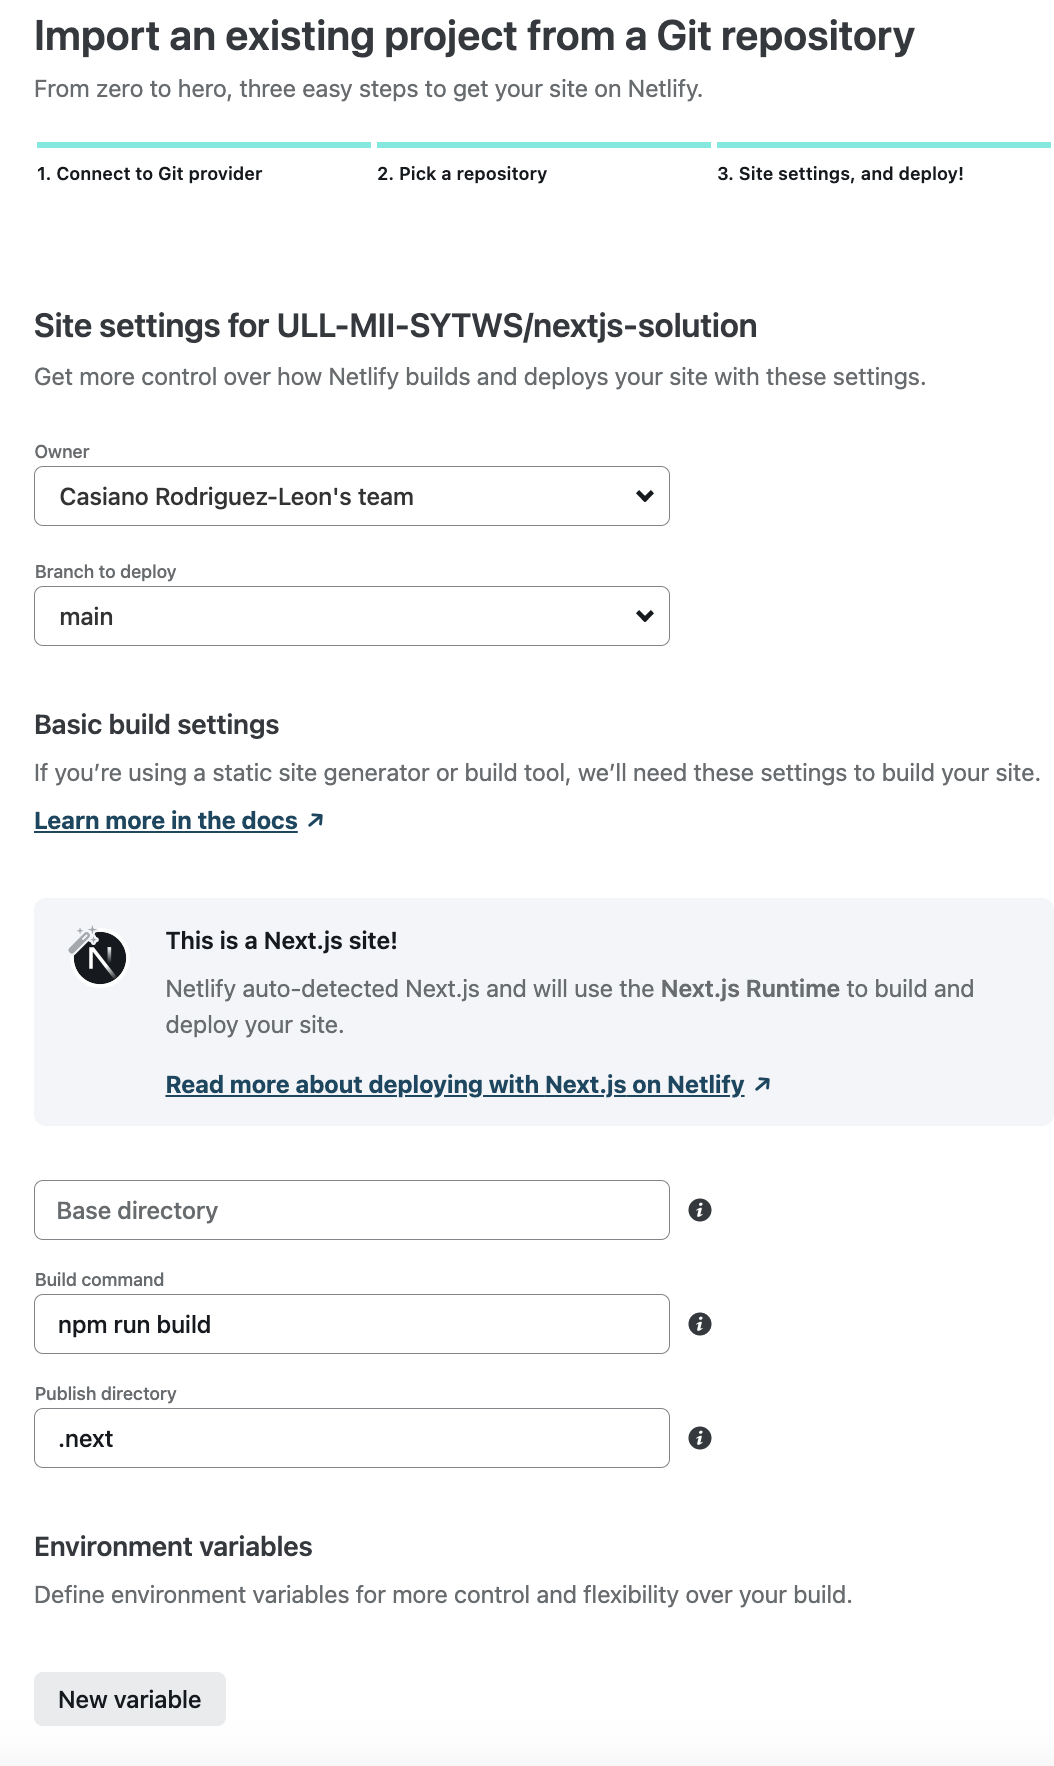
Click on show advanced. Go to Environment Variables and add the secret:
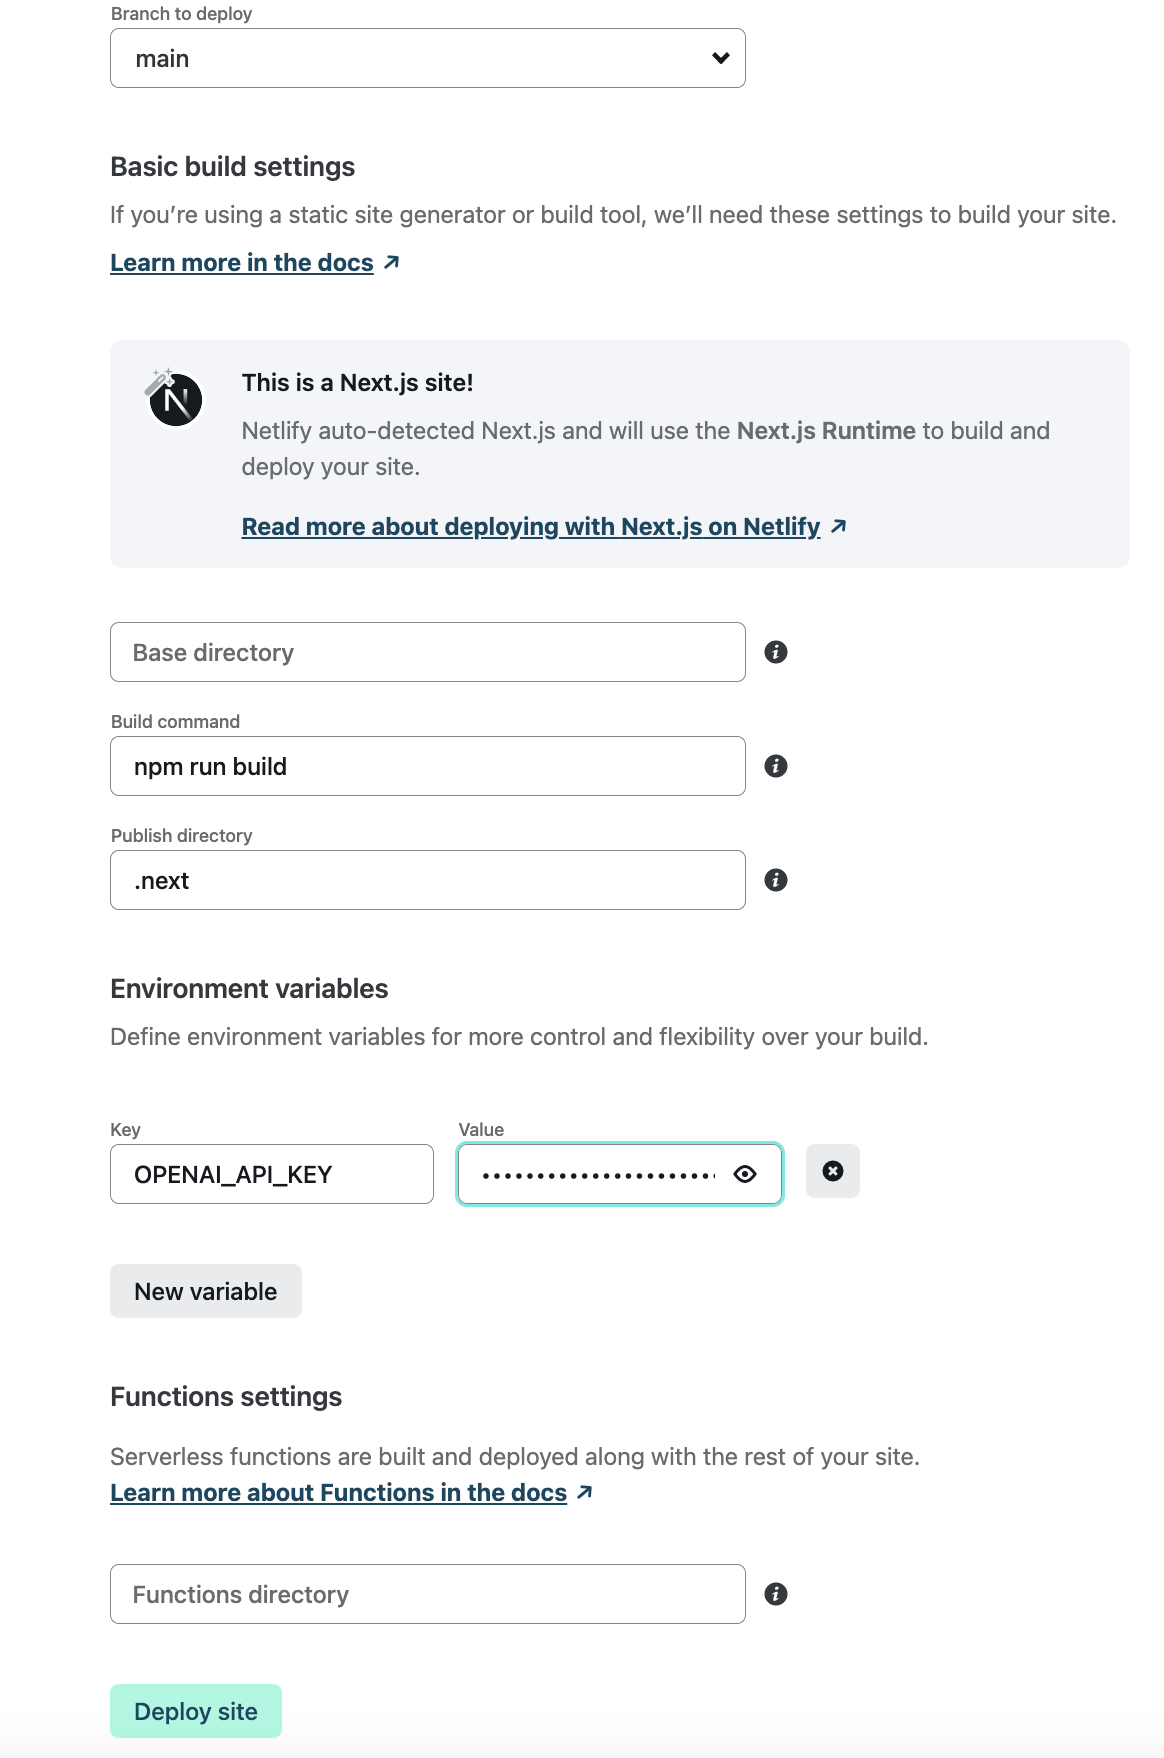
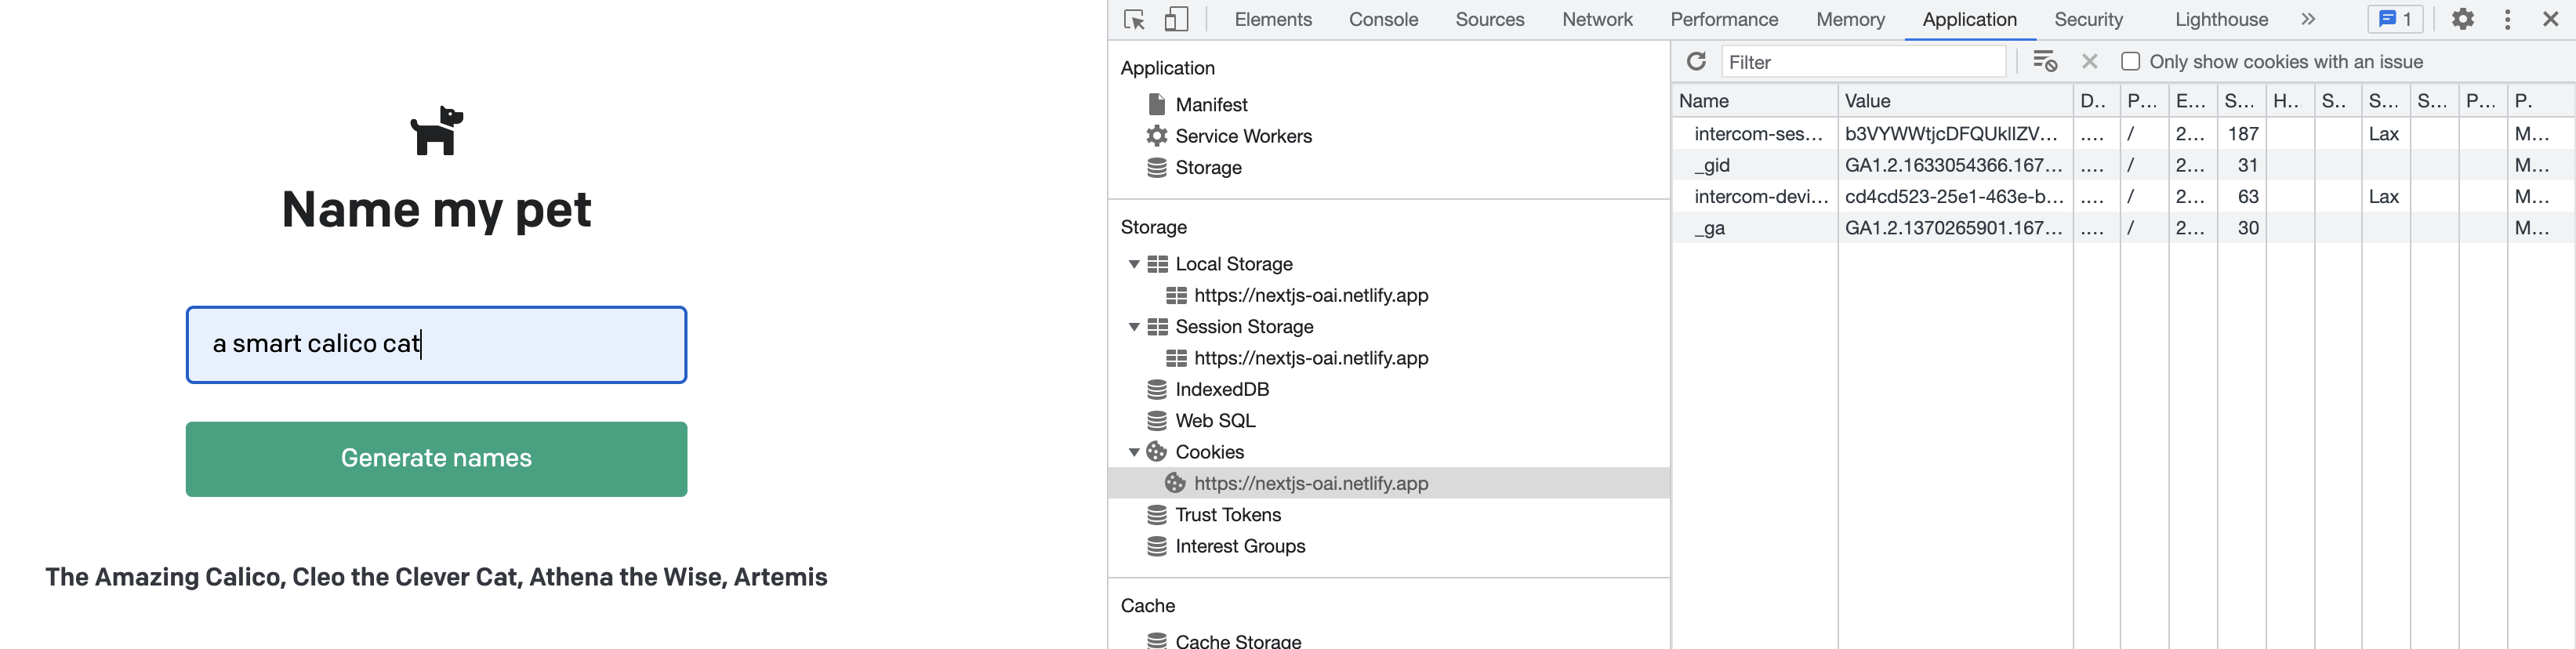
Finally, click on deploy site and after a while your site will be deployed and running:
Netlify Environment Variables
Environment variables are set and securely stored on Netlify and provided to the Next.JS server. This means we can avoid committing any sensitive values to our repository.
There are three ways to create site environment variables:
- In the Netlify UI, create site variables under Site settings > Environment variables.
- With the Netlify CLI, use
env:setto create a site environment variable, andenv:importto import from a.envfile. - With the Netlify API, use
createEnvVarsto create a new site environment variable.
The Netlify UI reflects any changes made using the CLI (ntl) or the API and vice versa.
Exercise: Deploy with the Netlify CLI
The Netlify CLI is a command line interface that allows you to manage your Netlify sites from the terminal.
Install the Netlify CLI
You can install it with npm:
➜  explorers-up-and-running-with-serverless-functions git:(main) npm install netlify-cli -g
added 1438 packages, and audited 1439 packages in 26s
➜  explorers-up-and-running-with-serverless-functions git:(main) npm ls -g netlify-cli
/Users/casianorodriguezleon/.nvm/versions/node/v16.0.0/lib
└── netlify-cli@12.2.8
➜  explorers-up-and-running-with-serverless-functions git:(main) ✗ ntl --version
netlify-cli/12.2.8 darwin-x64 node-v16.0.0
➜  explorers-up-and-running-with-serverless-functions git:(main) ✗ node --version
v16.0.0
Link the repo to Netlify
The first step is to link the repo to Netlify. Here we are using the --gitRemoteName option to specify the remote name sytws of the repo.
➜  nextjs-solution git:(main) ✗ ntl link --gitRemoteName sytws

netlify link will connect this folder to a site on Netlify

? How do you want to link this folder to a site? Use current git remote origin (https://github.com/ULL-MII-SYTWS/nextjs-solution)

Looking for sites connected to 'https://github.com/ULL-MII-SYTWS/nextjs-solution'...


Directory Linked

Admin url: https://app.netlify.com/sites/nextjs-oai
Site url:  https://nextjs-oai.netlify.app

You can now run other `netlify` cli commands in this directory
Check the status
Once we have linked the repo to Netlify, we can check the status:
➜  nextjs-solution git:(main) ✗ ntl status
──────────────────────┐
 Current Netlify User │
──────────────────────┘
Name:   Casiano Rodriguez-Leon
Email:  crguezl@ull.edu.es
GitHub: crguezl
Teams:
  Casiano Rodriguez-Leon's team: Collaborator
────────────────────┐
 Netlify Site Info  │
────────────────────┘
Current site: nextjs-oai
Admin URL:    https://app.netlify.com/sites/nextjs-oai
Site URL:     https://nextjs-oai.netlify.app
Site Id:      blah-blah-blah-blah-blah
List/Get/Set the environment variables
We can use ntl env:<subcommand> syntax to list, set or get environment variables:
➜  nextjs-solution git:(main) ✗ ntl env:list
1 environment variable for site nextjs-oai
.---------------------------------------------------------------------.
|                        Environment variables                        |
|---------------------------------------------------------------------|
|      Key       |                       Value                        |
|----------------|----------------------------------------------------|
| OPENAI_API_KEY | ************************************************** |
'---------------------------------------------------------------------'
Development mode with the Netlify CLI
We can see the site locally using the dev command of ntl:
openai-quickstart-node git:(main) ✗ ntl dev
Since ntl knows about Next.js, it will choose a suitable default configuration, it will create a .netlifyfolder:
✗ tree -I node_modules .netlify
.netlify
├── edge-functions
│   ├── edge-shared
│   │   ├── next-utils.ts
│   │   ├── nextConfig.json
│   │   └── utils.ts
│   ├── manifest.json
│   └── next-dev
│       └── index.js
├── edge-functions-import-map.json
├── plugins
│   ├── package-lock.json
│   └── package.json
└── state.json
and it will start the Next.js server injecting the environment variables .
We can change the settings adding a netlify.toml configuration file.
[[plugins]]
package = "@netlify/plugin-nextjs"

[build]
command = "npm run build"
publish = ".next"
Deploying with the Netlify CLI
Netlify deploys are atomic, and your site is never in an inconsistent state while you’re uploading a new deploy.
With File Transfer Protocol (FTP) or Amazon Simple Storage Service (S3) uploads, each file is pushed live one after the other, so you can get into situations where a new HTML page is live before the supporting assets (images, scripts, CSS) have been uploaded. And if your connection cuts out in the middle of an upload, your site could get stuck in a broken state for a long time.
Here is an example of a deploy:
➜  openai-quickstart-node git:(main) ✗ ntl deploy --prod
Deploy path: /Users/casianorodriguezleon/campus-virtual/2223/learning/openai-learning/openai-quickstart-node/.next
Deploying to main site URL...
✔ Finished hashing
✔ CDN requesting 27 files
✔ Finished uploading 27 assets
✔ Deploy is live!

Logs:              https://app.netlify.com/sites/nextjs-oai/deploys/6395e63207648c16d41001b7
Unique Deploy URL: https://6395e63207648c16d41001b7--nextjs-oai.netlify.app
Website URL:       https://nextjs-oai.netlify.app
The --prod option deploys to production, the --open flag opens the site after deploy